How to Prepare Your Allotment for Winter

Why Buy A Polytunnel?

How to Prepare Your Allotment for Winter:

How Do You Build A Polytunnel?

Thankfully, building a polytunnel does not need to be as hard as it looks. We've designed, and redesigned our tunnels over the years to ensure the best quality framework for the home grower market.

As with most build projects, the hardest bit is usually the preparation, ensuring your ground is well prepared, level and with the footprint marked out is key. We also advise having your trench dug around the footprint before the build, this allows you to fill the ground back in once the cover is on.

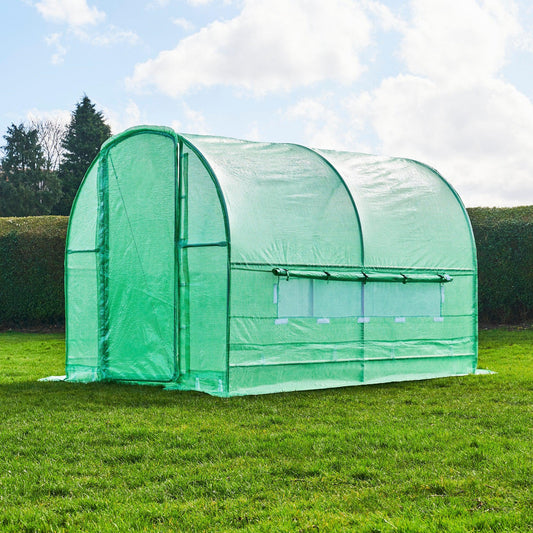
Our 3m tunnel is designed with a pop-and-click framework that should see the bulk of the work completed fairly quickly.

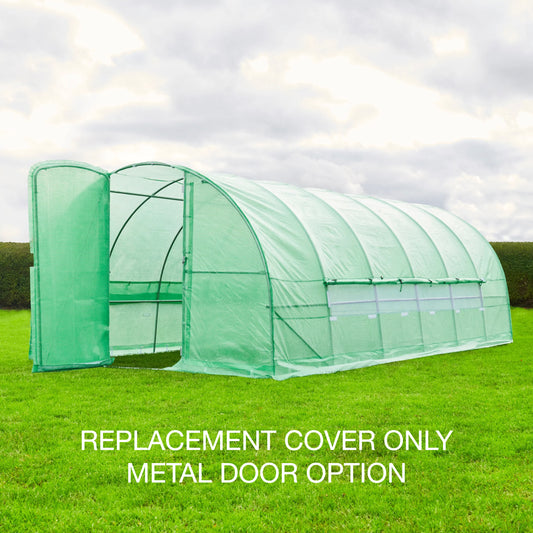
Our 6m tunnel has a robust bolt system due to the larger size - this task is better carried out by 2 people but once it's up it's up!

First is the dirty work, we strongly advise preparing a trench around the edge of where your polytunnel will be situated; the trench should be right at the edge of where your tunnel will sit so as much skirt as possible can be buried into the ground. This significantly strengths the tunnels ability to weather storms and high winds and is essential on exposed plots. 

An additional measure that might be worth considering if you live in a very exposed area is to use stakes or pins at the corners to create post to secure the tunnel to. This is by no means necessary on sheltered plots but can make all the difference on ones that regularly see high winds. We also sell a range of fixing kits and pins that can help keep the tunnel secure to the ground here.

If you buy a polytunnel from us we'll include all of the tools required to build it, the frame largely clicks together with some bolts required on supporting bars and the door. We advise having two people ready to fit the polytunnel cover as they are designed to fit very tightly to the frame and an extra bit of strength is always helpful.

Before fitting the cover now is the opportunity to fit hot spot tape across the frame. Hot Spot tape is essentially a roll of padded foam that helps to stop the cover rubbing on very hot points of metal. This may not be necessary on the entire frame but can help extend the life of the polytunnel if used on the frame that sees the most sun...it can get very hot in there and it helps protect the cover.

Once the cover is sitting nicely, you can burry the sides of your tunnel cover in the surrounding trench, making sure you keep things tight and don’t get any unwanted pleats in the cover. While burying the cover, keep stamping the earth down to really pin the cover securely.

Once you have finished stamping down the surrounding ground, get some good, heavy stones, bricks, or similar and place them all the way round the base of your tunnel et voila! you have now prepped the ground, built your tunnel and ensured the structure is as secure and strong as can be.

Key Features To Look For In A Polytunnel

A strong frame - we would advise staying away from any type of plastic or lightweight metal frame, they can easily start to give way in strong winds and have a much shorter life expectancy. Our Polytunnel range is made from strong 25mm steel and depending on size will either click together or our larger 6m polytunnel will be bolted together.

Durable UV-protected cover - Our heavy-duty covers are UV protected, the seem work has had extra care taken with them to ensure their durability. We also ensure that our covers include enough skirts for you to comfortably dig in the excess around the tunnel - We advise staying away from any tunnel that does not provide this as it is a key factor in securing the cover against storms and high winds.

Say no to zips! - After experiencing our own frustrations year after year with weak and damaged zips we designed a tunnel that didn't need any! both our 3m and 6m polytunnel have their own swinging metal door which means you can easily access and secure your tunnel without messing around with zips!

Bracing Bars - An absolute essential to see your tunnel through winter - avoid any models that do not offer bracing bars, it suggests the supplier is happy to cut corners at the expense of your tunnel.

Benefits Of A 6m Polytunnel

The obvious benefits are that you will be able to grow a wider variety, with more success over a longer period. Which is the grower's dream right? The sturdy 6m polytunnel will provide warmth, protection and consistency for your plants from January right through to December.

We love helping customers work out which size is right for them and whether a polytunnel could benefit their allotment, so if you have any questions or want some more advice why not get in touch with us here?

  • Wooden Cold Frame

    Regular price £129.99 GBP
    Regular price Sale price £129.99 GBP
    Wooden Cold Frame
  • Small Cold Frame Greenhouse

    Regular price £44.99 GBP
    Regular price £52.99 GBP Sale price £44.99 GBP
    Small Cold Frame Greenhouse
    Sale
  • Raised Trough Planter

    Regular price £44.99 GBP
    Regular price £52.99 GBP Sale price £44.99 GBP
    Raised Trough Planter
    Sale
  • Large Vegetable Planter

    Regular price £99.99 GBP
    Regular price £129.99 GBP Sale price £99.99 GBP
    Large Vegetable Planter
    Sale

Please get in touch with any questions;